- Turn on the Star Micronics mPOP device
- Open the 'Settings' icon of your iPad and select 'Bluetooth'
- Allow the search to complete and verify if the Star mPOP appears
- Select on the Star mPOP to connect
- Once successfully connected then you may open the SalesVu POS app
- Touch on the gear (settings) icon and select 'Printer Options'
- Touch on 'Search for printer/test print'
- Allow the search to complete and verify if the printer name appears
- Touch on the check mark to activate the printer and perform a test print
If the Star mPOP has issues connecting via Bluetooth then it is recommended to perform a reset.
- If the mPOP device appears under Bluetooth, touch on the info icon (i) and forget the device
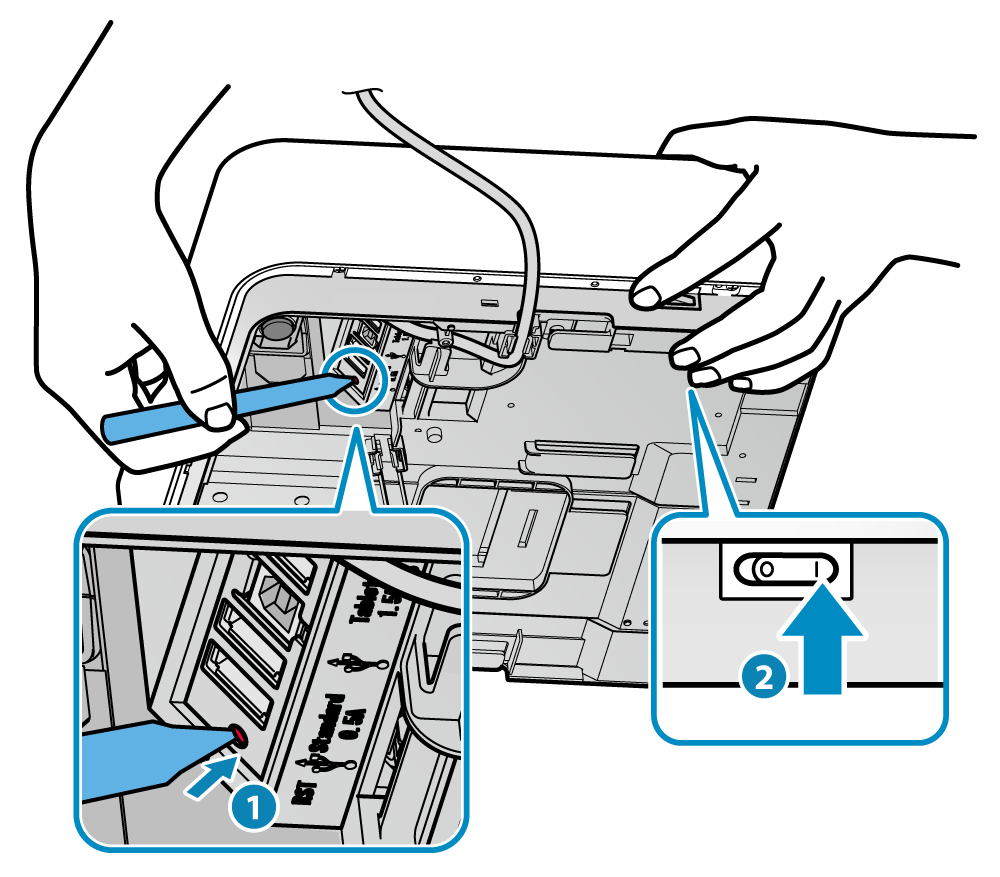
- Turn off the mPOP device by flipping the off switch (#2 of the image below)
- Use a small object and locate the red reset button below the device
- Press and hold the reset button (#1 of the image below)
- Turn on the mPOP device while holding the reset button
- Release the reset button once you see the flashing red and blue lights
- Wait for the printer to initialize and repeat steps above to connect via Bluetooth
